


Thursday, June 30, 2011
Martha Didn't Lie: 4th of July Pinwheel Royal Icing Cookies
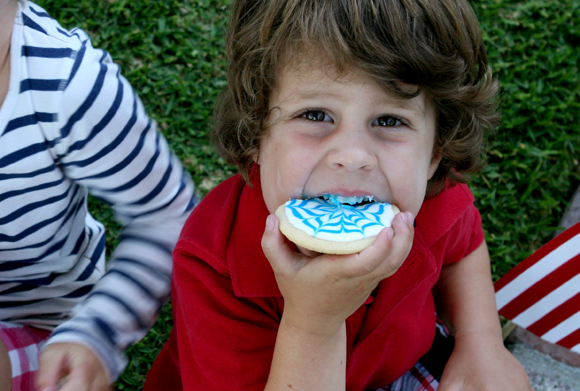
Thank you for visiting! This tutorial is no longer available here, but you can find it at my new blog For The Love Of, by clicking here. Thank you and enjoy!
Wednesday, June 29, 2011
I'll Be There

I absolutely love blogging. More than I ever thought I would. Sometimes I love it so much it's a bit of a problem because I obsess over it. There are some downsides to blogging, but really at the end of the day, I wouldn't trade in my little space on the web for anything (that's a bold statement, and of course I would trade it in for a million dollars or many other very important things, but you know what I mean).
Anyhow, the thing I love most about blogging is that it doesn't happen in a vacuum. Blogging exists because we all exist out there, inspiring, encouraging each other, sharing our God given talents on a daily basis. And I can't wait to meet so many of you out there in real life! You read someone's blog and you think you know them, but the knowing really comes when you can hug a person, hear their voice, see their smile for real. That's what I'm looking forward to the most about Blog Sugar 2011. Sure, there are going to be amazing speakers and uplifting panels to attend, but really, it's connecting with other bloggers in a very real and tangible way that I look forward to the most.
So come on September, hurry up and get here! But not too fast, because we still have a lot of work to do!
Go visit Rachel to see who else will be there this year :)
Playgrounds & Lollipops - Comfort Revisited

{Pants: James Perse; Top: Ann Taylor Loft; Shoes: Sam Edelman; Necklace: Gift from old coworker;
Bracelet: Forever 21; Zippered Clutch: American Apparel}
Let's get back to that subject of comfort shall we? Tim Gunn says that women often fall prey to the comfort trap. So how as women with busy lives do we stay comfortable and yet still look put together? The answer for me anyhow, is this: Elastic Waistbands.There's just something about an elastic waistband that breathes comfort, probably because you can breathe even after you've eaten too much, right? This has been another favorite outfit of mine in the last couple of weeks. These pants here have an elastic waistband, and elastic at the ankles and are made of a soft cotton/silk blend, which pretty much just makes them a fancy pair of sweatpants. They are pretty much like the best pants eva on steroids. They can very easily borderline on sloppy though if you're not careful, so I try to wear them with something upstanding and lady-like, hence the shiny top. Oh it may be hard to tell in these photos, but this blouse has tiny shiny lurex threads woven in it, making me feel very fancy. Yes, I feel fancy in gladiator sandals, glorified sweatpants, and a shiny top. Go me.
Take that Tim Gunn.


Tuesday, June 28, 2011
4th of July Mason Jar Luminaries

Monday, June 27, 2011
DIY Seed Bead Necklace Tutorial

To get the rest of the tutorial please visit here (I've moved the best of my DIY posts to my new blog)! Thank you!!
Saturday, June 25, 2011
PTA Moms Gone Wild

Friday, June 24, 2011
Thoughts of the Week - Limos, Astro-Turf & Glitter Nails

- Taylor's last day of Kindergarten was Tuesday. I just barely, barely teared up. Nothing close to the waterworks I displayed on the first day, and the weeks leading up to the start of Kindergarten. I look back, and I was so scared and anxious, not knowing how it would be having her gone 5 days a week. Not knowing how she'd do. Would she make friends, would she like her teacher, would she enjoy her school work? Add on, me going back to work full time, and it was a perfect storm for a flood gate of emotions. But she amazed me this year. She is stronger and more confident that I have EVER given her credit for. Shame on me. I know every mother says this, but I'll go ahead and add in, that I couldn't be more proud of her. Bring on 1st Grade, school's got nothing on us! So what was harder for you ladies with kinders, the first day or the last?
- With school officially out for both kids Friday beach days are here, starting today. Since Taylor goes to a year-round school, we only have 6 short weeks to spend with the rest of our friends, so we've got to make them count.
- We hosted Father's Day here at our house, and the thought of having multiple sets of muddy feet running in and out of the house made me a little nervous. So Art went to Home Depot and picked up some astro-turf to minimize the mud tracking. After he laid it down, he came in and declared "Alright honey, your yard's done. Don't it look purty?" Try again buddy ;) We're still waiting on final pool inspection before we can even think about starting on landscaping. We're still undecided on just how much of a DIY project we're gonna make it. All depends on how the bids come in I guess. I'll post some full pool pics next week, not just these little teasers.

- I went to the gym or worked out 4 days this week. I've gained almost 15 pounds in the last few months so time to get serious again. I feel good, and sore, but good.
- Tonight I'm celebrating a dear friend's birthday. A group of us are taking a limo out to LA for cocktails and dancing. I'm wearing the orange skirt. None of us have been to the depths of LA in a while so we're a bit nervous because it's such a different scene than what we're used to. Nothing like the safe confines of Long Beach ;) But we vowed to not play it safe so we have a list of places to try and we've got a limo till 2 am. The limo was won at a school auction for her Kindergartener. For some reason I just think that's awesome. A group of women in their mid 30's hitting up LA for a night of dancing, in a limo, won at a school auction. Classic.
- A night in LA calls for a bit of glitter don't you think? I'll be trying this combo tonight.

Thursday, June 23, 2011
Bathroom Remodel Reveal
A few of you showed an interest in seeing pics of the bathroom where I shot this hair tutorial, so I thought I'd show you all the end results of the kid's bathroom redo, that we completed almost a year ago! If you recall from a post a long time ago, my inspiration was loosely based off of this image here. Overall, I love the way it all came together.

 Aside from painting the kid's rooms and adding bead board, this is the only project we've tackled inside the house. We're still so undecided on what we want to do with this house, but we knew from the beginning that we were going to want to update this room, as it's the not only the kid's bathroom, but the only guest bath as well. The old cabinet was situated in an odd way around the plumbing pipes, leaving the drawers only able to open half way, so we knew we wanted to replace the cabinet to get fully functioning drawers.
 The light fixture was HUGE and looked oddly out of place in this very tiny bathroom. The bathroom measures 9'x5', so at 4' long, it took up almost half the bathroom

 The sink was very old and had a constant leak not only from the spout but from one of the handles as well.

 The new cabinet had fully functional, full size pull out self-closing drawers with plenty of storage underneath


 This hoop art was from Jenn over at Ruffled Sunshine. She was my partner for Heather's hoop art swap a few months back. Little did she know that "You Are My Sunshine" is the song we sang to both kids when they were babies. I love it so much.
 There's nothing like big white baseboards. These are 6" which were a bit of a challenge for Art to cut with his miter saw, but he figured it out.


The medicine cabinet was functional, but needed to be replaced along with the cabinet to match.
Rundown of what we wanted to tackle:
- Replace cabinet unit along with sink & fixtures
- Replace lighting
- Replace medicine cabinet
- Replace shower & tub fixtures
- Paint
- Add new baseboards
What we were leaving As Is:
- Floor tile (not our favorite, but definitely could live with it)
- Shower tile (it was simple clean, white tile that we knew we could live with)
- Toilet (in good condition, with a couple of chips at the bottom, but still functional)
To save costs on this project, we did a few of the things ourselves as well as used some unconventional methods.
Here's a breakdown:
- We installed the baseboards & door casings ourselves
- We installed recessed lighting ourselves
- We traded services to get the sink, bathroom cabinet and medicine cabinet essentially for free
In the end, what we paid for was:
- Fabrication and installation of the Caesar Stone counter top
- Painting the cabinet and bathroom
- Faucet fixtures
- Artwork & accessories


The rectangle sink is nice and deep, minimizing splashes by little kids

I love all the little pops of color throughout


The trash can and tissue holder were originally white, but I added some paint for a bright pop of color.
Product Details:
- Counter tops are Caesar Stone and was a remnant at the yard (great way to save some money)
- Sink is from Kohler, Ladena model
- Faucets & Towel Rack are American Standard straight from Home Depot shelf
- Towels are by Amy Butler from Bed, Bath & Beyond
- Tissue Holder & Trash Can are from Home Goods originally white painted coral
- Toothbrush Holder & Porcupine Nail Brush are from Urban Outfitters
- White tray is thrifted, originally gold spray painted white
- Artwork is from The Wheatfield on Etsy, frames are from Target
- Clock, Shower Curtain & Rug from Target
- Mirror is from flea market, originally gold spray painted white
- Paper Banners were made by me
- Paint color of cabinet is Sunken Pool & walls are Whetstone Gray, both from Martha Stewart Hope Depot paint collection
Wednesday, June 22, 2011
Playgrounds & Lollipops - Comfort Trap
"Most women wear clothes that are too big – that's the comfort trap. Women don't want to feel constrained, but I say, if you want to dress to feel as though you never got out of bed, then don't." Tim Gunn on women falling into the "comfort trap"

This has been my go-to outfit for the last couple of days. Lightweight, men's parachute poplin pants that don't feel stifling when the gloom wears off and the heat cranks up, and a super soft knit cardigan that is the perfect layering piece. While I admit the outfit is sort of androgynous, a nice pop of Coral Crush ensures I won't be mistaken for a boy.
So what do you think? Would Mr. Gunn excuse my lazy outfit, or would he say I need to step it up a bit? Either way, I kinda don't care. It's officially summer and I officially have no where to go. I'm embracing that feeling while I can.


 P.S. The winner of the friendship bracelets is Katie! Send me a note Katie with your address and I'll get them shipped out next week. Congrats friend!


{Cardigan & T-Shirt: James Perse; Cotton Poplin Drawstring Pants: Old Navy Men's Section;
Shoes: Converse; Bracelets: DIY by me}
I wonder what Tim Gunn would think of my outfit? While I wholeheartedly agree that some women nowadays do dress a little too comfortably, preferring yoga pants as the major staple of their wardrobe, I have to say that sometimes you just need to feel comfortable. The kind of comfort that only a baggy pair of poplin pants and an oversize cardigan can provide. Add in a pair of Chucks for long walks around the neighborhood, chasing after kids riding Big Wheels, and you're all set. I sort of feel a little preppy in this look too, with the mix of classic colors like Navy Blue and Kelly Green. What do you think?This has been my go-to outfit for the last couple of days. Lightweight, men's parachute poplin pants that don't feel stifling when the gloom wears off and the heat cranks up, and a super soft knit cardigan that is the perfect layering piece. While I admit the outfit is sort of androgynous, a nice pop of Coral Crush ensures I won't be mistaken for a boy.
So what do you think? Would Mr. Gunn excuse my lazy outfit, or would he say I need to step it up a bit? Either way, I kinda don't care. It's officially summer and I officially have no where to go. I'm embracing that feeling while I can.
I'm linking up with Lindsey for WIWW :)


Tuesday, June 21, 2011
Group Craft Monday - 3D Art Canvases
Oh my gosh guys, what a whirlwind of a week it has been! All good, but so full and busy, starting with dear hubby's birthday, then a flurry of activities at Taylor's school; end of year Kindergarten performance, Special Person's Day, Awards Ceremony, Summer Jam, her first ballet recital and then of course Father's Day. Honestly, we had a really, really good week. Father's Day was wonderful and we spent the day relaxing and swimming and I felt proud to spend time with a few of the awesome men in my life. My kid's couldn't be more lucky to have such great male role models surrounding them. And today's Taylor's last day of Kindergarten. My mantra for the day? I will not cry, I will not cry, I will not cry. We'll see how long I can hold up.
Yesterday, we slowed down just a bit and had some friends over for a little crafting with the younger kids while the older kids were still in school. My friend Miranda had the great idea of starting a regular craft day during the summer to encourage us all to break out our stash of art supplies and try something new for the kids. It was her day to organize the first one and we made these awesome butterfly collages from Whatever.
 Miranda came prepared with the canvases already painted which was perfect since our age range was from 1-4, and she brought some larger butterflies that were already cut out from scrapbook paper from a previous party. Syd, oh my little Syd is the only boy in the bunch of our 9 kids, so for him she had the great idea of creating a solar system themed art board for him, and painted his canvas black.
You can find the full instructions on Meg's site, but really you don't need much more than a small art canvas, acrylic paint for the canvas, a butterfly punch, watercolors & paper. Super simple project with a great end result! To affix the butterflies, you can use a glue gun or in our case we just used those double sided sticky pop dots from the scrap-booking aisle.


 It was so cool to see the different arrangements the kids came up. Using their creativity to make a "standardized" craft something of their own. Some used layers of large, medium and tiny butterflies to make their masterpieces.


Yesterday, we slowed down just a bit and had some friends over for a little crafting with the younger kids while the older kids were still in school. My friend Miranda had the great idea of starting a regular craft day during the summer to encourage us all to break out our stash of art supplies and try something new for the kids. It was her day to organize the first one and we made these awesome butterfly collages from Whatever.

You can find the full instructions on Meg's site, but really you don't need much more than a small art canvas, acrylic paint for the canvas, a butterfly punch, watercolors & paper. Super simple project with a great end result! To affix the butterflies, you can use a glue gun or in our case we just used those double sided sticky pop dots from the scrap-booking aisle.
You start by letting the kids paint with the watercolor,
trying to fill as much blank space on the paper as possible.
Some use paint brushes, some use fingers. No big deal :)
Syd focused on trying to paint circles for his planets.
Once the paper is painted to their liking, use a butterfly punch to cut out the butterflies.
I used a circle punch for the planets and also did some free style cutting for the rocket ship.
Affix them to the canvas with the pop dots in any pattern they want.
Others used just the small butterflies and scattered them about.
I love that this one looks like a flock of butterflies taking flight.
Layers and layers of winged creatures popping off the canvas
And of course the boy version of this craft ;)
Syd loves to craft so it was nice to tailor this one a little more to his tastes. Honestly he would have created a butterfly canvas and thought nothing of it, but the fact that it was a solar system project,
to fit in perfectly with his room, got him very, very excited.
Once it was done he zoomed his space ship all around the yard.
3, 2, 1...
BLAST OFF!
On display :)
Now I've got to think of a project when it's my turn to host.
Anyone have some fun links or ideas they can share? Something appropriate for 3-6 year olds.
P.S. I'll announce the winner of the Cord & Chain Friendship Bracelet tomorrow!
P.S. I'll announce the winner of the Cord & Chain Friendship Bracelet tomorrow!
Subscribe to:
Posts (Atom)


