Quantcast
Showing posts with label DIY Crafting. Show all posts

Wednesday, July 4, 2012

A Red White & Blue Day!

Happy Birthday America!  May you all have a fun, safe and blessed 4th of July!  I'll see you back tomorrow.  In the mean time, a few links for you... 
image via Camille Styles - click over to her site to get the playlist and listen right on your computer
a roundup of 20 crafts you can do with the kids today to keep them busy till the fireworks come!
 a year later and these 4th of July mason jar luminaries are still a hit.  Make them today with a couple of simple supplies you probably already have at home!
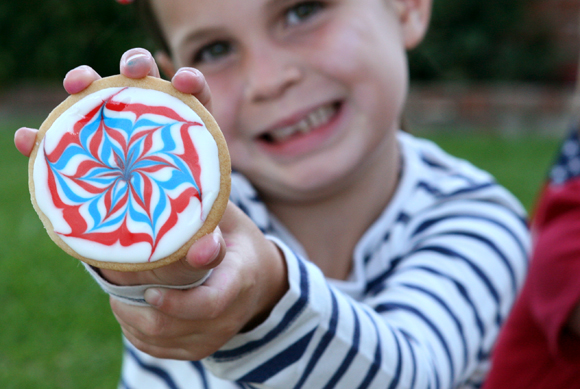
 if you have some patience and some time (or you just want an excuse to be inside with the air conditioning), make these patriotic pinwheel inspired cookies!

Tuesday, June 26, 2012

Personalized Summer Journals

It's been fun reading everyone's responses to their favorite thing they love about Mod Podge in the giveaway, and I was even surprised to hear that some of you have never tried working with it before.  For those of you that are brand new to Mod Podge, I wanted to share an easy tutorial to get your feet wet; these personalized summer journals.  Taylor and a friend will soon be starting a fun week at the beach for Under The Sea camp, so I thought it would be great for them to each have a special journal to keep track of memories of the week, and for the rest of summer for that matter.
The journals I found at Michael's in the dollar bin were cute on their own, but since I wanted them to be a bit more personalized, I gathered up a few supplies to make it happen.  You'll need a journal (the harder the cover the better, these are a really thick cardboard), some cute paper (mine is from Paper Source), Mod Podge in Matte, Mod Podge Podgeable Shapes, an applicator brush, letter stickers, and optional if you'd like to stencil on a shape, a stencil and paint.
Begin by tracing and cutting out your piece of paper, 1 for each side.  I liked the red binding so I cut accordingly to keep that in the design.
Cut out the corners of your paper so they fit around each corner nice and neat and fold over paper.
Paint a thin layer of Mod Podge all over the cover of the journal.  It's very important that you apply the Mod Podge first before applying your paper.  I did a trial run and forgot this since it had been a while since working with Mod Podge in this way, and I spread the Mod Podge over the paper and it just created a bubbly, wrinkly mess.
Lay your paper in place over the cover and smooth out any slight wrinkles or bubbles.  This is cimpletely normal so don't fret, just get a straight edge ruler or soemthing and gently work out the bubbles and wrinkles.  Lay a thin layer of Mod Podge over the wrapped paper to secure in place as well.
Next to personalize the podgeable name plate.  Apply your stickers, then if you wish, you can add a cute paper backing to have peek through.  Spread a thin layer of Mod Podge on the back of the podgeable, and then lay your cut piece of printed paper right side down.  Spread another thin layer of Mod Podge on back of the podgeable and stick in place on your journal.
Add a final thin layer of Mod Podge on the binding of the book where the paper meets the binding just to make sure to secure in place and let dry.  Once your journal is dry, you can add on your stencil if you wish.
The final result is a sweet personalized journal to give as a gift or keep for yourself.  Total project time was less than 30 minutes, not counting drying time, which is minimal.  If your layers are thin, Mod Podge usually dries enough to be handled in under an hour, but allow more time before fully using.  Let me know if you have any questions and don't forget to enter the giveaway!
For more fun ideas, visit Mod Podge on Pinterest, on Facebook and on Twitter

I wrote this post as part of a paid campaign with Plaid Crafts and Blueprint Social, but the opinions and ideas in this post are my own.

Tuesday, June 19, 2012

Choosing DIY Projects You'll LOVE

Hi friends, how was your weekend? I do realize that it's Tuesday and I should've been asking you that question yesterday, but in case you noticed I took yesterday day off. The family and I took an impromptu trip down to Legoland on Father's Day and came home yesterday afternoon. It was too quick, but with Art's work schedule being what it is, I'll take what I can get.

With summer in full swing for most of you (Taylor still has 8 days left of school and it's only 75 degrees here), I thought I'd write a post a little different than the norm and share some thoughts and ideas on DIY'ing. I know summer is the time when a lot of you ramp up on projects or look to start new projects with the kids, so I wanted to share some tips to help you choose DIY projects that you'll love, not get frustrated with.
I spent almost 2 hours walking around Michael's on Saturday, by myself, the rarest of luxuries.  It was glorious and relaxing.   While I was browsing, my creative juices flowed like crazy and I thought of too many projects I'd love to try.  But it was good to have time to think and be inspired.  While browsing I thought up this blog post in fact!  So friends and readers have asked me in the past, "how do you decide what to make?  Where do you begin?", so today I'll take you through my creative process and how I decide what to create, and what ideas to leave on the table.
  • first and foremost, start with one-three mediums and build from there.  For me, my primary mediums are fabric paint, jewelry, and paper supplies. These are the things I'm drawn to and so I focus my energy, time and financial resources on those types of projects.  I stray every now and then, but for the most part my projects reside in those areas.  Narrowing your focus down will save you time and money!
  • find inspiration in places other than Pinterest.  Pinterest is amazing, don't get me wrong, but you'll be surprised what you can be inspired by when you look around.  Magazines, books, browsing Michael's for two hours, thrift stores, fashion stores, beauty supply stores, whatever.  Spending too much time on Pinterest can also leave you feeling down and like your project will never be good enough, look pretty enough as A, B or C.  So get in and get out, don't linger for hours on end.
  • don't create a DIY just for a blog post (if you blog), create it because you want it or need it.  I've done this before because I think readers will love it, and I tell you, it's just a waste of time.  My most well received DIY projects are the ones I created for myself because I really did want it, or the ones I thought very few people would love (case in point this seed bead necklace and the statement necklace I created for Making It Lovely - who knew those would be such big hits?)
  • know your limits and stick with your skill level, or slightly above your skill level.  It's great to challenge yourself, so if the pattern says for advanced beginner, and you're a beginner, go for it and teach yourself new things!  But save yourself tears and agony and don't go for the mega-advanced complicated pattern, no matter how cute and amazing it is.
  • factor in your cost of supplies and time to decide if a DIY project is even worth it financially.  I was recently considering make baby #3 his/her own crib skirt, but after factoring in the cost of fabric plus the hours it was going to take me to sew something new, I decided to just buy the $60 crib skirt I found online.  I think I made a good call here.      
Creating DIY projects are supposed to be fun and enjoyable, not stressful and a time suck.  You shouldn't feel like you want to punch someone in the face during the process ;) I've learned this along the way, and am still learning when to go for it and when to keep it simple and simmer down on the crafting.  What are some other tips you could share or have found to be helpful? 

Monday, June 11, 2012

Iridescent Watercolor Lanterns

I can't believe we started these lanterns almost a year ago.  After seeing them all hung up tonight, it makes me so happy we finally finished them.  The idea for these lanterns originally came from a craft we did at our local Rancho, although the kids all used the same color of paint and hung them on the ends of sticks to use as fishing lanterns.  I've wanted to replicate them ever since, only to hang in the backyard.  Turns out the project was worth the wait.       
To make your own, you'll need some paper lanterns, iridescent watercolors in gold and/or silver, watercolor paints, and paint brushes and spray bottles.  Our paper lanterns are from Discount School Supply and held up nice to the layers of paint.  I'm sure if you handled them gently, standard paper lanterns would work just as well.  And in fact I buy all my watercolors from Discount School Supply because they have the best price on the nice big bottles.  We use watercolors a lot and these bottles have lasted us at least a year.  The spray bottles were just cheapies from the Dollar Store.
The kids begin by layering on the iridescent watercolor paint, making sure not to get them too wet.  They just need a light, thin layer to show through the paint, and the more they soak them, the longer they'll take to dry.  After they've painted on the iridescent color, let dry for a few minutes, and then lightly spray on some watercolor paint in whatever color(s) they choose.  They could also brush on the watercolors, but using the spray bottle is a novelty for them.    
While it works better to hold the spray bottle away from the lantern, spraying up close like Syd did won't harm it at all, it just won't get a "sprayed" look to it.  The kids hands will get dirty so dress them in play clothes, as sometimes I have a hard time getting watercolors out. 
Taylor does not believe in the adage "less is more", and she sprayed on 2 coats of every single color we had.  At first it looked like a big mess of one dark color, but believe it or not, all the colors did in fact peek through once the paint is dried.  So don't micro-manage, just let them do their thing ;)
They'll take a good hour to dry completely.  Once dry, you can hang them in their room, on a stick to bop around with, or on cafe lights in your backyard, like I did.  I used clear monofilament wire to hang theirs.  
Once dry, the iridescent gold and silver paint really does show through, and all that mess of color Taylor sprayed on ended up looking like a very pretty, swirly, rainbow of colors.  
A craft easy enough for a kid to do all on their own, with results sophisticated enough for a backyard dinner party at twilight.  These will surely be hung in our backyard all summer long.  
Enjoy!  And let me know if you have any questions :)

Wednesday, April 25, 2012

DIY Mermaid Sea Terrariums

Thank you for your thoughts on my post on Monday.  I always love hearing your wise words and I'm working on responding to the comments (something I fail miserably at everyday).  I briefly mentioned the craft the kiddos did and I thought I'd share a few more about the details that went into it.  My goal with this craft was for the kids to have fun first and foremost, but also not to send the kids home with just more stuff that their moms would have to find a place for.  Hopefully these little mermaid sea terrariums will be on display for some time.  I also have a grown up, more sophisticated version of the sea terrarium up at Making It Lovely.  Please go check it out if you have a chance.  So here is what you'll need if you want your kids to make their own sea life terrariums.

Supplies: Sand (I used play sand that's you get in a 10lb bag at the hardware store for $5 - it proved to be the perfect consistency and really looks the most like ocean sand); succulents that remind you of seaweed and sea-life; succulent type ground cover to represent algae; some sea shells and pretty rocks and stones (I found all of mine at Michael's in their floral section.  Each bag was under $4), and if you wish, these fun miniature mermaids that are actually cocktail drink markers.  What?  Don't judge, you try finding miniature plastic mermaids that would have been suitable.  They come all colorful and bright, and I made a deal with Taylor that I could spray paint half of them white and leave the other half the cheery bright colors.  It was a hard sell but I achieved it. Oh, and you'll need mason jars of course for the vessels!  I used quart size with the wide mouth so the kids would have an easier time reaching in.
Pretty much just let the kids go at it, filling their jars with sand and gems.  I did have to provide some assistance with tearing off bits of the succulents to place in the jars, the girls really didn't want to harm the mermaid's future home you know. 
It was such a fun and sweet craft.  Each girl carefully chose her mermaids and shells/rocks and carefully placed them inside the jars.  They worked hard getting the succulents to fit in just so.  And the best part is, the moms didn't mind bringing them home because it wasn't just more junk to clutter up the house.
Now I do want to talk practically about these terrariums.  For succulents to truly survive they need organic rich matter to root in.  Sand will not be enough for them to grow and flourish, and eventually these will die.  For ease of the craft we just had the kids use the sand, but if you really wanted your terrariums to survive, you'd need to add some cactus soil to the mix.  I talk about this more in depth over at my MIL post.  So just beware that these will not last forever.

So far they're doing great though and both Syd and Taylor have theirs on display in their rooms. We've long been fans of succulents and if you'd like to see some of my other work with them, see this post about succulent planting tips and this post for creating your own succulent centerpiece.  And here's a sneak peek at the grown up version I created over at MIL.


Tuesday, April 17, 2012

DIY Neon Bow Bag

For some reason this cute little DIY never made it in during Neon Week, but it's just too sweet not to share, so in case you're needing a little neon added back into your life, here's a simple and fun project.
You'll need fabric paint in your choice of colors, your bow paper punch from this project, freezer paper and a plain canvas tote.
Cut out your strips of freezer paper and punch out your bows, then iron on your bag and start painting.  Same exact concept as the heart punch bag.
Let paint dry and the carefully peel off freezer paper, and you're done!  Yes, another bag DIY, but I JUST CAN'T STOP! :)  Have fun and enjoy!  To see the rest of the NEON WEEK Projects, please visit my other blog For the Love Of under the tag Neon Week!

Wednesday, April 4, 2012

DIY Neon Bow T-Shirts For Girls

I couldn't leave out my daughter while thinking of projects for neon week, especially after making neon dinos for my son.  A couple of months back I was in the Kate Spade store buying the neon gumdrop earrings when I was hit with inspiration.  All I could see for a brief moment were bows and neon.  Sort of like being hit over the head and seeing stars.  I went home and googled bow paper punches and of course Martha Stewart made a cute one that wasn't the least bit cheesy.  Oh Martha what would we do without you?

I basically used the same concept here as I did for my heart punch canvas bags that have since become a hit.  Cut strips of freezer paper, punch out your bows, iron on and paint in.  That's how I achieved the neat symmetrical rows in the shirt seen on the little blonde cutie above.  For Taylor's shirt I just cut out bows in a random pattern and ironed them on in a waterfall effect.  I did the same gradating colors, landing on beige, as I did for my T-shirt seen on For the Love Of.  It really can't get more simple than that.  My main tip is to place a rag between your layers of T so that the paint doesn't bleed through.

Taylor loves her neon shirt so much and I'm going to make some for gifts.  I just used the standard T-shirts from Target that are $5.  A great little shirt for any girl in your life.   
P.S. Thanks so much Shelly for letting Ellie model for me and I hope she's enjoying her bow t-shirt as much as Taylor is!

Tuesday, April 3, 2012

DIY - Neon Dinos For Kids

 I mentioned before that some neon love would be coming your way here on Four Flights of Fancy, in addition to at my other style site.  Well here you go, this one is a child-centric DIY that will jazz up any toys you may have lying around.  Since my son has an affinity for dinosaurs, the choice here was obvious.  In all honesty I had to spray paint these when he was not looking in order to avoid a freak out, but once they were complete, he did freak out, but in a good way.  He loved them so much he took them with us to Park City.  And while I thought my son would be the only one attracted to the fluorescent dinos, turns out my daughter has an affinity for them too.  Like mother, like daughter eh?
 Begin with some plastic toys of any kind really.  Cows, dogs, horses, or in this case, dinosaurs. 
Add a coat or two of spray paint primer.  You will have to do some shifting around in between coats to ensure full coverage, and may have to add a coat or two. 
Then add a couple of coats of your selected color choice of neon spray paint and let dry completely.  I wouldn't let little toddlers prone to still biting on their toys play with these, but since we're nearing 5, my son has completely outgrown that stage.  Instead he sucks and chews on his blankie, because that's not babyish or anything.  Note to self: must work on the blankie addiction. 
Put on display or encourage play.  Either way, these cool creatures from the Jurassic age will fit in perfectly with today's trend conscious, hip parents ;)
Note to you, my fine readers: There's lots of other neon goodness going on over at my other blog, For the Love Of.  The type of neon goodness meant for you grown up, hipster ladies interested in adding a bit of neon fun to your life.  See them all here.

LinkWithin

Related Posts Plugin for WordPress, Blogger...