There was a lot of love for the Seed Bead necklace tutorial, but the overwhelming theme was that many of you didn't know if you'd have the patience or time to string that many little beads. I feel your pain, so this necklace is made out of larger beads, and since it's only one strand, you can finish this project in just about an hour! You need a few more supplies than you did with the seed bead necklace, but they are all inexpensive so you can get everything you need for just around $20. Let's get started with what you'll need:
Also not listed is a pair of wire cutters to cut your chain and some sort of fabric (details to follow) for your tassel. The beads I used are a glass bead and cost a total of $6 from a genuine bead store. I also wanted a more unique looking chain than the options I found at Michael's so I bought my chain for $3.99 at the same bead store. The crimp beads are on the smaller side, but any size will do really; the jump rings are 7mm, the head pins are 2 inches but you can definitely use shorter ones, and the bead wire is 9.2m.
Start by adding a jump ring to one end of the chain and then with a crimp bead already on the stringing wire, loop the stringing wire through the jump ring
Make a loop of the wire and put the other looped end of the wire through the crimp bead
Just like so
Pull tight and as close to the edge of the jump ring as possible and them crimp the bead closed with the pliers Trim off the excess end of the wire like so
And then begin stringing
Add a crimp bead to another jump ring on the opposite end of the chain to complete your necklace
Finished product without tassel :)
You can start by making a couple of decorative strung beads to hang next to your tassel by adding some beads to a head pin Twist the end into a loop
And then trim off the excess wire with the wire cutters
For the tassel, cut a few strips of sheer fabric in 3x3 squares. I used standard tulle for the black tassel and crushed tulle for the white. I much preferred the crushed tulle because it was softer and gauzier, not so stiff, but I could only find it in white at my local fabric store. You could also buy a real tassel that you use for pillows and such, it would probably look really cute, a la Love Maegan. I just couldn't find a color that I liked to go with the chartreuse green beads.
Basically just fold over the fabric and then tie a strip of tulle around the top to create a little pouf
Cut a straight line at the edge (or don't if you'd prefer not to); I just didn't want it to look so much like a ghost
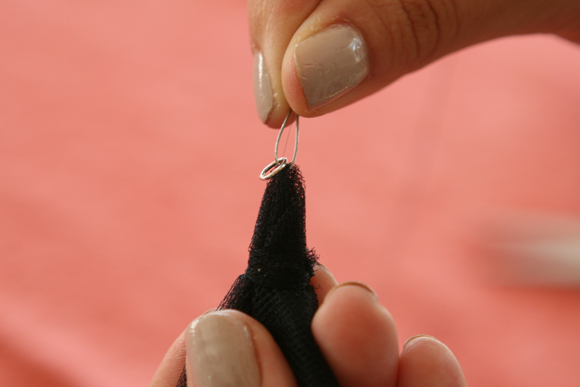
I'm sure there is a much fancier, more professional way to attach the poof but I couldn't figure it out :) So I just threaded some of the beading wire though the top with a jump ring attached and then added a crimp bead to close off. I then attached the tassel directly to the necklace with that jump ring. Add your tassel and the other decorative beads and you're done!
My necklace is a total of 36 inches in length, with the chain making up 20 inches and the beads making up 16 inches. The color options with the project are endless. My local bead store had so many crazy pretty choices it took me about 30 minutes to make a decision but I kept being drawn back to this acidic green color so just went with it. To change the tassel from black to white it's as simple as undoing the jump ring with your pliers and attaching the other tassel. I love the black for a night time look and then the white for more of a day look. I wore the white with a navy and striped maxi dress and it really popped against the navy.
I know it seems like there is a lot of "steps" to this necklace, but really when you break it down into the necklace part, the tassel part and the decorative bead part, it's really very simple and easy :) Enjoy and let me know if you try it! For some of my other DIY tutorials, visit here and here
Linking up with Today's Creative Blog for Get Your Craft On Tuesday


Dang, I wish I had this level of creativity!!! You are too cool!
ReplyDeleteadorable! love it love it love it.
ReplyDeleteseriously, you are way too cool;)
ReplyDeletelove the colors you chose, perfect for summer and looks GREAT on you! xo
thanks for the fancy tutorial!
So pretty!!!
ReplyDeletethat is really cute. I totally need to accessorize too! Thank you!!
ReplyDeleteI love the tassel trend.. I just bought a vintage Donna Karan necklace on etsy..circa 1988 with a large gold tassel.... Reminds me I need to wear it!!
ReplyDeleteI love the one you made!!